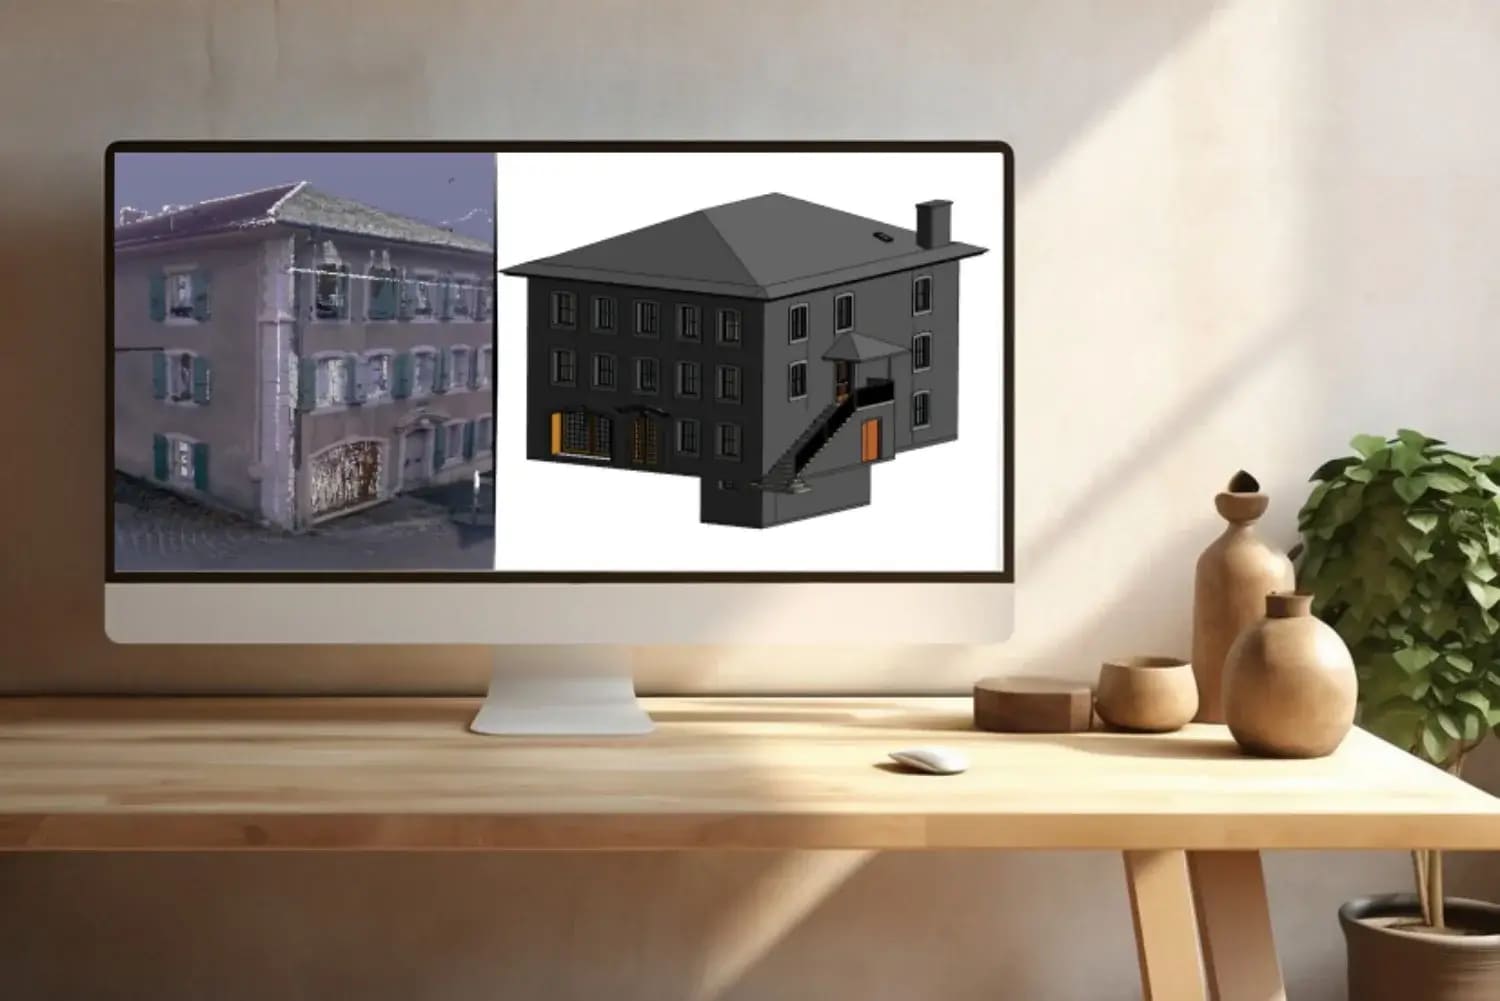
Convert Point Cloud to Revit Model
Convert Point Cloud to 3D Model, Convert Point cloud to 3d revit model, convert point cloud to bim model
Step-by-Step Process: How to Convert Point Cloud to Revit Model
In the rapidly evolving world of Architecture, Engineering, and Construction (AEC), the use of advanced technologies is essential for maintaining a competitive edge. One such technology that has transformed the AEC industry is the use of point clouds to create detailed and accurate 3D models.
This article will provide a comprehensive, step-by-step guide on how to convert the point cloud to the Revit model. We will delve into each stage of the process, offering detailed insights that will be valuable for AEC professionals in the USA and the UK.
Get in touch with Us
Follow Us
Why Convert Point Cloud to Revit Model?
Before we dive into the conversion process, it’s essential to understand what a point cloud is. A point cloud is a collection of data points in space, typically acquired using laser scanners or photogrammetry. Each point represents a precise location on the surface of an object, and collectively, these points form a detailed 3D representation of that object. Point clouds are used extensively in the AEC industry for their accuracy and ability to capture complex geometries.
Converting point cloud data into a Revit model brings numerous advantages:
- Precision: Point clouds offer high levels of detail and accuracy, which are crucial for creating reliable BIM models.
- Efficiency: The conversion process streamlines the workflow, reducing the time needed for manual measurements and model creation.
- Visualization: Revit models allow for better visualization and analysis, facilitating improved design decisions and project management.
Step-by-Step Process to Convert Point Cloud to Revit Model
Step 1: Data Acquisition
The first step in the conversion process is acquiring the point cloud data. This involves using laser scanning devices or photogrammetry techniques to capture the existing conditions of a site or structure. The data is then processed to create a point cloud file. Common formats include.RCP, E57, PTS, and . LAS. Ensure that the data is clean, with minimal noise and artefacts, to facilitate a smoother conversion process.
Step 2: Importing Point Cloud into Revit
Once the point cloud data is ready, it can be imported into Revit. Follow these steps:
- Open Revit and create a new project or open an existing one.
- Navigate to the “Insert” tab and select “Point Cloud.”
- Choose the point cloud file you wish to import. Revit supports various formats, but it’s advisable to use the.RCP format for best compatibility.
- Position the point cloud correctly within the project environment. Ensure that it aligns accurately with your project coordinates.
Step 3: Setting Up the Point Cloud
After importing the point cloud, the next step is setting it up for modeling. This involves adjusting visibility settings and creating views that will facilitate the modeling process:
- Visibility Settings: Use the Visibility/Graphics Overrides (VG) menu to control the visibility of the point cloud. Adjust the density and colour settings to make the points more distinguishable.
- Section Views: Create section views to isolate specific areas of the point cloud. This will help in focusing on different parts of the model and ensuring accuracy.
- Clipping Box: Use the clipping box to further refine the visible portion of the point cloud, making it easier to work with specific sections.
Step 4: Modeling in Revit
With the point cloud set-up, you can begin the modeling process. This involves tracing over the point cloud data to create a Revit model. Here’s a detailed breakdown of this step:
- Architectural Elements: Start by modeling the primary architectural elements such as walls, floors, and roofs. Use the point cloud as a reference to trace the geometry accurately.
- Structural Elements: Next, model the structural components like beams, columns, and foundations. Ensure that these elements are precisely aligned with the point cloud data.
- MEP Elements: Finally, model the mechanical, electrical, and plumbing (MEP) systems. This includes ducts, pipes, and electrical conduits. Accurate modeling of MEP systems is crucial for coordination and clash detection.
Step 5: Refining the Model
Once the basic elements are in place, refine the model by adding details and making adjustments. This step involves:
- Detailing: Add detailed elements such as windows, doors, fixtures, and fittings. Ensure that these components are accurately placed according to the point cloud data.
- Adjustments: Make any necessary adjustments to the geometry to ensure that it aligns perfectly with the point cloud. This may involve tweaking dimensions and positions.
- Quality Check: Perform a thorough quality check to ensure that the model is accurate and complete. This includes verifying dimensions, checking alignments, and ensuring that all elements are correctly modeled.
Step 6: Exporting and Sharing the Model
The final step is exporting the Revit model for use in other applications or for sharing with stakeholders. This can be done by:
- Exporting to IFC: Export the model to an IFC (Industry Foundation Classes) file for interoperability with other BIM software.
- Collaboration: Use Revit’s collaboration tools to share the model with team members and stakeholders. This includes using cloud-based platforms like BIM 360 for seamless collaboration.
- Documentation: Generate construction documents, including plans, sections, and elevations, from the Revit model. These documents are essential for construction and project management.

Let's create something great together!
Best Practices for Converting Point Cloud to Revit Model
To ensure a successful conversion process, consider the following best practices:
- Data Quality: Ensure that the point cloud data is clean and of high quality. Remove any noise or unnecessary points to facilitate easier modeling.
- Accuracy: Maintain a high level of accuracy throughout the modeling process. Use precise measurements and alignments to create a reliable Revit model.
- Collaboration: Foster collaboration among team members to ensure that all aspects of the model are accurately represented. Use cloud-based tools for real-time collaboration and sharing.
- Training: Provide adequate training for team members involved in the conversion process. Familiarity with both point cloud processing and Revit modeling is essential for success.
- Software Updates: Keep your software updated to the latest versions. This ensures that you have access to the latest features and improvements, enhancing the efficiency and accuracy of the conversion process.
Conclusion
Converting point cloud data into a Revit model is a complex but rewarding process that brings numerous benefits to AEC professionals. By following the detailed steps outlined in this guide, you can achieve accurate and efficient point cloud to Revit model conversions. Whether you’re in the USA or the UK, adopting this technology will undoubtedly enhance your project outcomes, streamline workflows, and improve collaboration.
Remember, the key to success lies in meticulous planning, precise execution, and continuous improvement. Embrace the power of point cloud to BIM conversions and elevate your projects to new heights.